
The
Bark Canoe Store
17 East Sinto
Spokane, WA 99202
(509)327-7902
(509)327-7989
barkcanoe@earthlink.net
www.barkcanoe.com
John Lindman
proprietor/builder
Copyright (c) 2005
All Rights Reserved
IN THIS ISSUE
1. News -
- Updates in the Web Site - A More Navigatible "Tips" section
- More used canoes on the Consignment Page
- The Advance "Build Your Own" Class for 2005 (lots of photos)
- The Canadian Canoe Museum
- The Art of Frank Schoonover
2. Building Tip -
More on Miniatures by Ted Behne
News -
Updates in the Web Site - A More Navigatible "Tips" section
If you have tried to navigate into and through the "Tips" section in order to find building tips from past newsletters and got frustrated well you aren't alone. That has, hopefully, been made simplier with a menu list on the first page. If you go to The "Tips" Page you can check it out. Let me know if it is still a problem.
The Advance "Build Your Own" Class for 2005
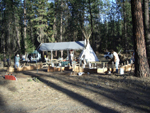
We just wrapped up the first "Build Your Own" class on the 18th of September. It was a pilot project to see if it would be workable. I really wasn't too sure going into it. At first I thought, "nope, too much work preparing all of these materials". The students were saying, "Oh yes you must do it again." What determines whether or not something was a success is the result. If you look at the photos you can determine that for yourself.
Yes we will do it again. There are a few minor modifications but the essence of the program is the same. You will come, the materials will be prepared in advance (this year I was a bit behind and was preparing them during the class), lodging will be included in the fee, you can bring a helper and you will depart with your own canoe.
We had 3 students this year which worked out good. I wasn't sure how many I could accomodate going into this class but three was perfect for a pilot class. Next year we are limiting enrollment to 4. Registration for that class will terminate on June 1st but most likely it will fill up well before that time. Drop me an e-mail if you have any questions or would like to enroll.
The Canadian Canoe Museum
If you haven't been to the Canadian Canoe Museum in Peterborough, Ontario, Canada then you have a treat in store for you. This is what others had told me. I was in eastern Ontario building a canoe at a camp north of Toronto so once done I worked it out to go there.
The creative director/head artisan is Jeremy Ward, a great guy. I was with a friend who lives in the area and Jeremy spent a good chunk of his day with us -we even got to go out to the warehouse where more canoes were stored. It is especially a good place to look at different types of canoes and see how the builder did what he did. There is a good representation of the various types of canoes on hand. It is nicely laid out, a great resource for any canoe enthusiast. You can check them out at The Canadian Canoe Museum.
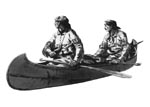
The Art of Frank Schoonover
Recently I saw some great old prints depicting scenes with birchbark canoes and noted the artist's name - Frank Schoonover. I had never heard of him. After doing some more snooping around I discovered he had done a number of paintings of birchbark canoes.
Back in the early 1900s he studied under Howard Pyle whose students made up much of what was known as the Golden Age of Illustration. This was the same school which produced N.C. Wyeth - more great illustrations of birchbark canoes and Maxfield Parrish. Frank took a couple of trips to the Canadian north for adventure and to garner material for future paintings. One trip was in the winter where he went up to the Hudson's Bay area. From this he produced paintings and drawing depicting trapping, life at Hudson's Bay Posts, guys falling through the ice, etc.
The next trip was in the area north of western Lake Superior, in the Long Lake district. While artists like Phillip R. Goodwin, Wyeth and Remington painted mostly birchbark canoes from the northeast, Schoonever painted the Ojibwe. If you like that style of canoe - which I do - then you will like his work. His style is very rich and dynamic. I highly recommend his books. I picked up both of them on amazon.com. One is entitled "The Edge of the Wilderness: A Portrait of the Canadian North" by Frank Schoonover. The other is "Illustrator-Artist of the Canadian and American West, Frank Schoonover's Frontier" by Cortlandt Schoonover (his son). For more information or to view samples of his work visit the Frank E. Schoonover catalogue raisonne.
Building Tip - More on Miniatures by Ted Behne
Making Sheathing
This article will outline the process for making sheathing to line the inside of the hull. Sheathing strips are made from white cedar and cover the interior of the canoe between the ribs and bark. They are held in place by rib pressure and serve to distribute rib pressure to form smooth, fair lines on the hull. Previous articles outlined other canoe-making processes: Selecting a canoe to model; reducing its dimensions to one-quarter scale; making a "blueprint" of the canoe; constructing a reusable building platform; making a gunwale frame; making and installing thwarts; making ribs, splitting cedar, and splitting spruce roots for lashings. To review previous articles, go to The Bark Canoe Store, and look over the menu listing tips from past issues of "The Bark Canoe Aficionado."
There are two major approaches to sheathing the interior of Native canoes. One, the overlapping method, overlaps the edges of thin, random-width and length planks, like shingles on a roof, so as to cover the inside of the hull completely. Mostly Native people west of New England and Eastern Canada use this sheathing style. Its advantage is that it is relatively fast and easy both to make and to fit the sheathing.
The other style, called edge-to-edge sheathing, is more complicated and time-consuming, but it produces a more elegant, finished appearance in the canoe. This sheathing style is used mostly by Native people in New England and in the eastern provinces of Canada.
Both approaches use sheathing planks that are 1/8" thick. The overlapping method requires planks of sufficient length to cover either one-quarter or one-fifth of the canoe. Depending on the pattern chosen, planks are overlaid end-to-end and side-to-side to cover the entire interior of the canoe. The edge-to-edge method requires precisely tapered strips with perfectly straight edges, of sufficient length to cover each half of the canoe, overlapped with feathered edges in the center.
Start by reviewing my previous article on splitting cedar. The rough sheathing blanks are prepared to approximate length, width and thickness by splitting. Then they are finished to final dimensions using a crooked knife and/or small block plane. Random widths vary from 3-5 inches. It is crucial to maintain uniform thickness of 1/8" for the entire length of each plank. Any lumps or bumps on the sheathing will become lumps and bumps on the outside of the hull. Measure the interior of the hull and make enough sheathing to completely cover it.
For the edge-to-edge method, first measure the length between the stem and just beyond the center thwart. This will be the length of each tapered plank. Next, measure the hull surface from gunwale-to-gunwale both at the tip of the gunwale frame and at the center thwart. The difference between these two measurements is a ratio that will be used to form the tapered, edge-to-edge planks. For example, if the measurement at the gunwale tip is 16 inches and the measurement at the center thwart is 36 inches, then the ratio between the two hull surfaces is 2.25. So, if a tapered plank is 5 inches wide at its center end, the stem end will measure 2.22 inches. Mark these two measurements at each end of the rough blank. Then stretch a chalk line or a straight edge between the two measurements to mark a straight line. Cut along the marked line to produce a tapered plank. Sight down the line with your eye and smooth out any variations with a small hand plane. Repeat the process until you have enough sheathing to completely cover the interior of the canoe.
All of the above instructions apply to full-size canoes. The same procedures apply to models. Just reduce all the measurements by one quarter. With models however, there is a work-saving shortcut. Hobby shops sell basswood strips that are 1/32" thick, already the perfect quarter-scale thickness. The finished planks are indistinguishable from those made from cedar.
Next, we will begin the assembly process, the final 50 percent of the work that goes into building a birchbark canoe. That process will be described in next month's newsletter.
If you have questions about any of the above, just send an email to
tedbehne@comcast.net.
You can view Ted's work here.
To remove yourself from this list, simply reply to this email with the word "REMOVE" in the subject.
------------------------------------------------------------------------------------------